STEP 1: Cut out the fabric
Before you start working with the fabric, wash it thoroughly and iron it well. This will prevent any unwanted deformations later on when you wash it for the first time.
Use the pattern as a guide and cut out two mirror pieces from each type of fabric.
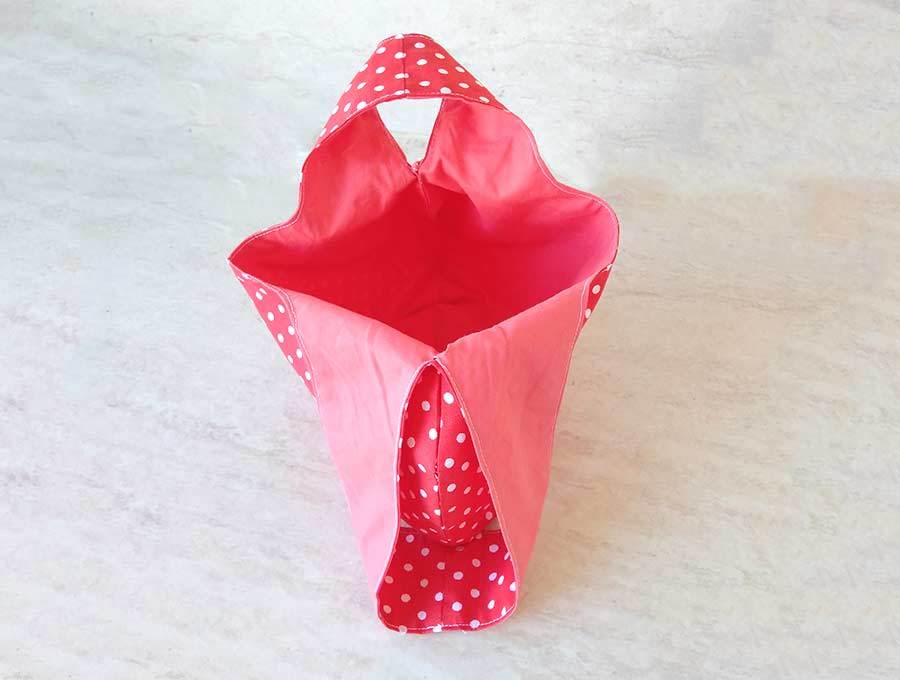
The dimensions of our finished knot bag will be around 11 x 15.5 inches, including the longer handle.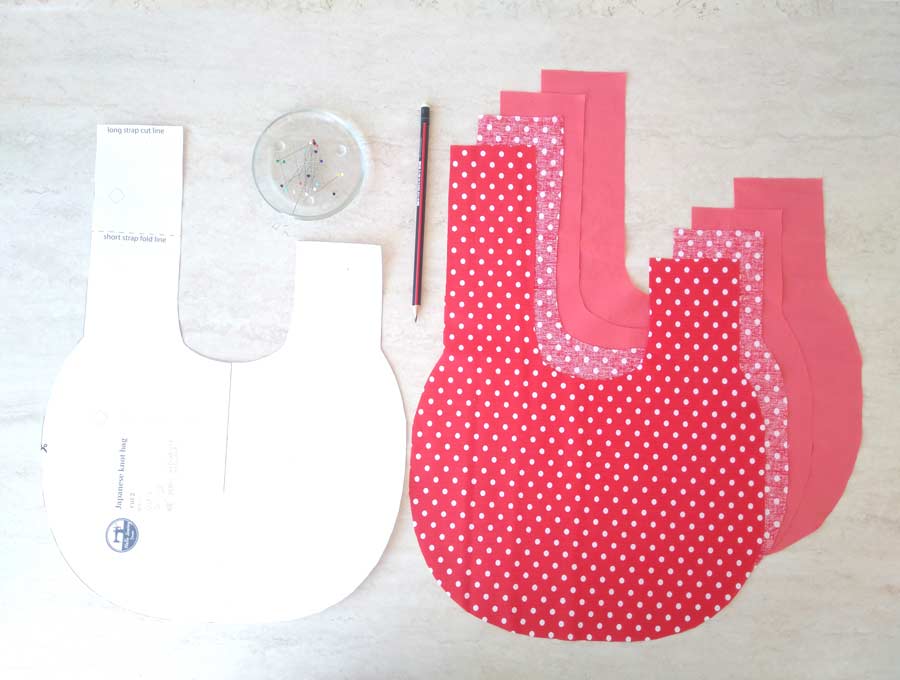
TIP: To get mirror pieces you will need to fold your fabric either wrong sides together or right sides together and then cut.
STEP 3: Start stitching the knot bag
Place the fabric pieces on top of each other, with their wrong sides up. Align the edges and secure with pins or clips.
Using a 3/8 inch seam allowance, start stitching the two layers together. Begin just below one handle and go along the bottom curve, all the way to the other side. Stop the stitch below the second handle.
Make a stitch on the upper edge of each handle.
Repeat the entire process with the second set of fabric pieces.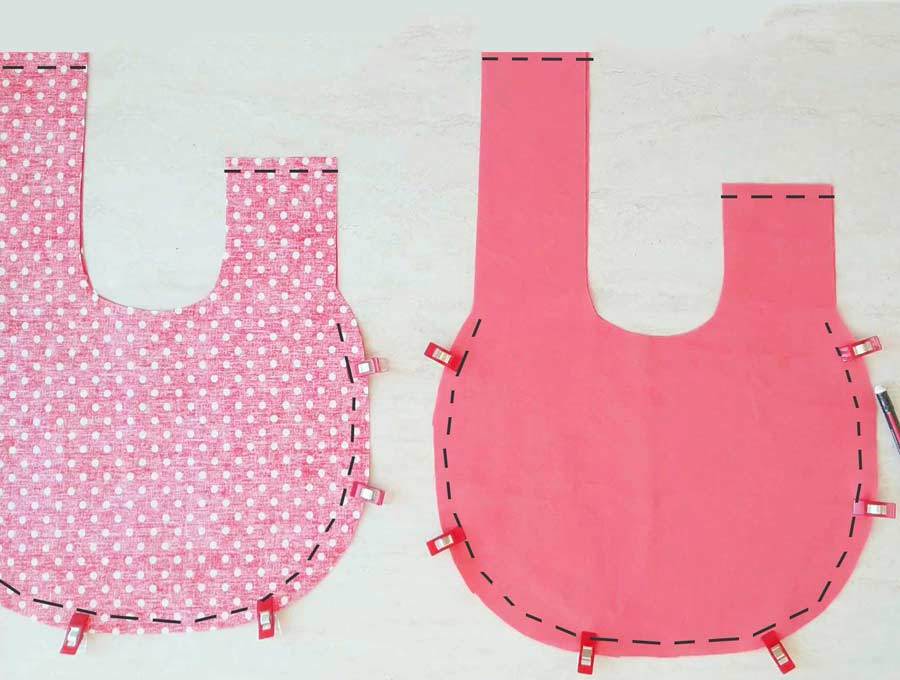
STEP 4: Prepare the bag for further stitching
Make small cuts along the bottom curve of the fabric piece. Keep the cuts about half of an inch apart. Turn one of the fabric pieces inside-out. Insert it into the second piece.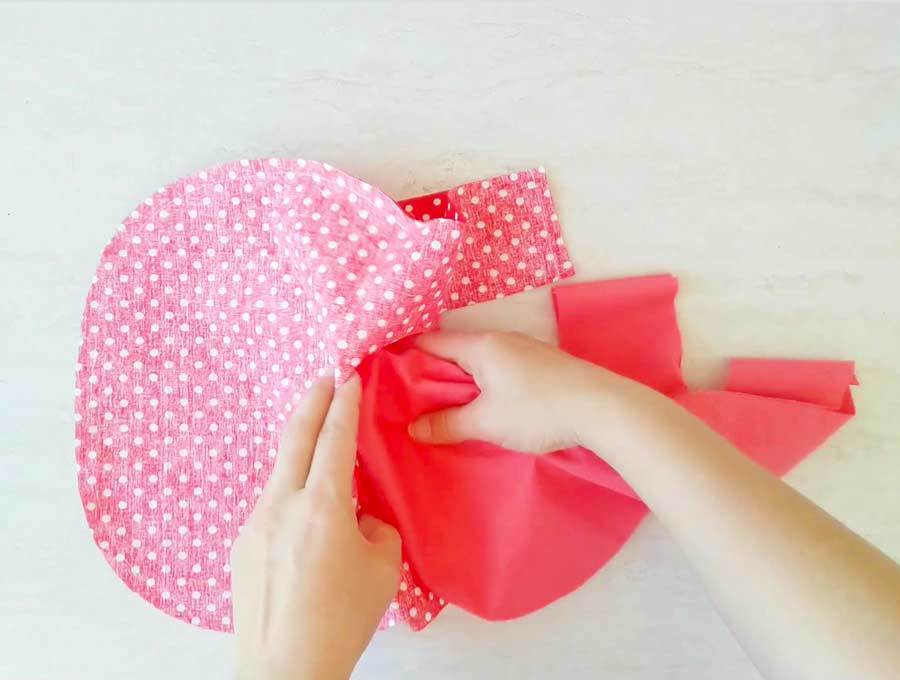
Align the two sets of fabrics with each other and secure everything in place with pins or clips. Don’t connect all four layers together! Keep the gap between the two sets or you’ll end up closing the bag shut.
STEP 5: Stitch and turn
Using a 3/8 inches seam allowance, sew along the curve between the handles. Pay attention not to stitch all four layers together.
Make some shallow cuts about half-inch apart along the inside curve of the handle.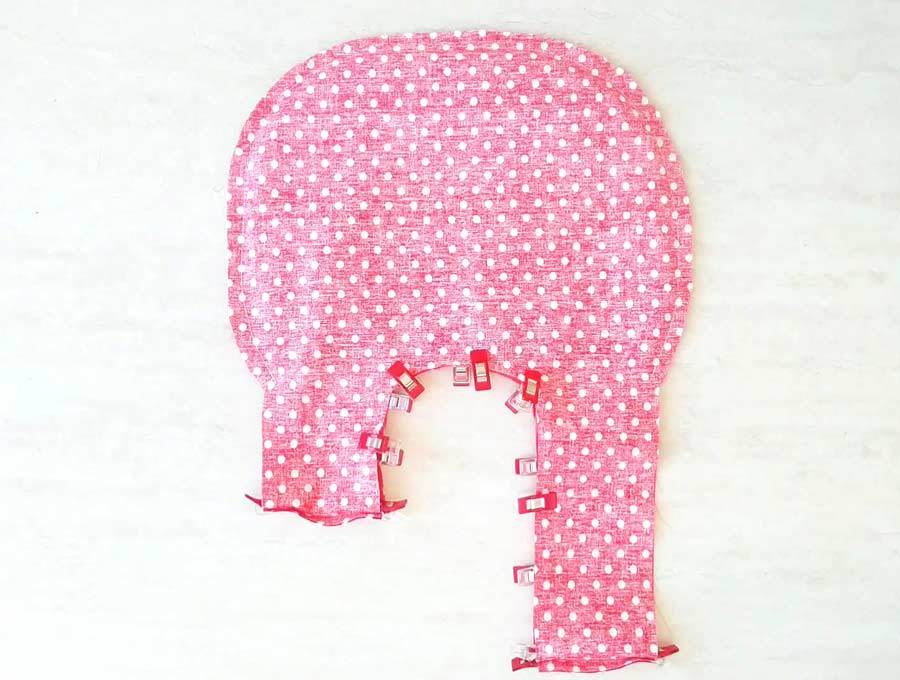
Turn the entire knot bag inside-out through the opening at the handle. You will probably pull one fabric from the other while doing this, so just return them back into each other. Press everything flat.
STEP 6: Topstitch the curve
Now you will need to topstitch along the inside curve between the handles. Be careful not to sew the bag shut as you do this. Start the stitch from the top corner of one handle and stop at the top corner of the second handle.
STEP 7: Finish the Japanese knot bag
All that’s left is to sew the outer edges of each handle that are still raw and unstitched.
Fold each of the raw edges inwards for about half of an inch. Press them flat with your iron. Secure everything with pins or clips.
Now topstitch along the outer edge of each handle. Start from the top corner of the handle and go all the way to the beginning of the bottom seam. Make sure that you don’t sew the handles shut when sewing.
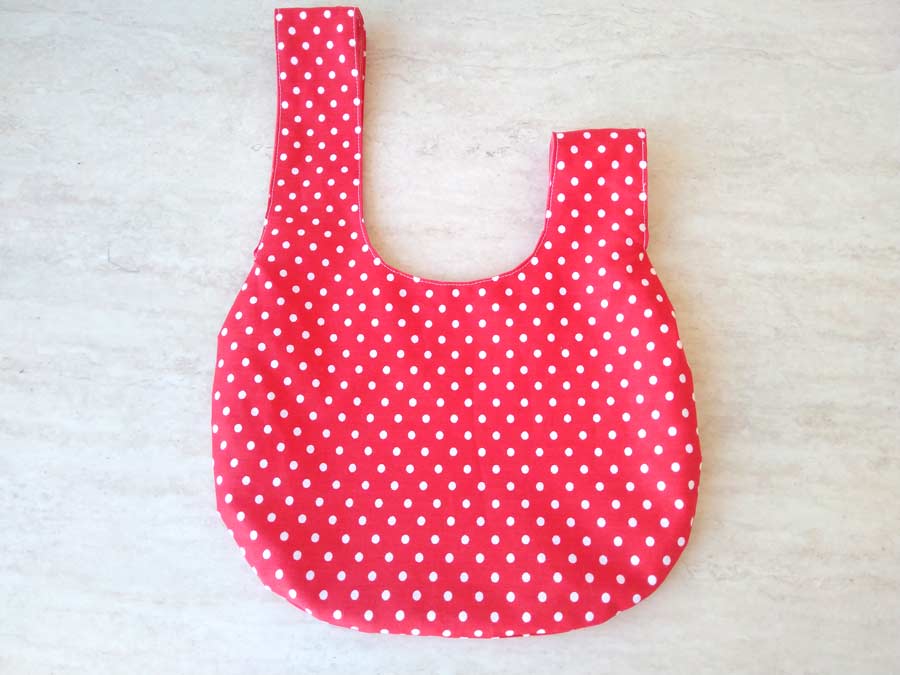
This completes our Japanese Knot Bag tutorial! The bag is officially ready for action.